📌 Introduction
Exposure is one of the most fundamental concepts in photography. It determines how light or dark your photos appear. Understanding exposure is the key to creating images that look professional, balanced, and visually appealing. If you’re new to digital photography, mastering exposure will give you greater control over every shot.
What Is Exposure?
Exposure refers to the amount of light that reaches your camera’s sensor. Too much light results in a overexposed (too bright) image, while too little light leads to an underexposed (too dark) image. The goal is to achieve the right exposure, where your photo has good detail in both shadows and highlights.
Think of it like a window: opening it wide lets in a lot of sunlight (overexposure), while barely cracking it allows very little light in (underexposure).
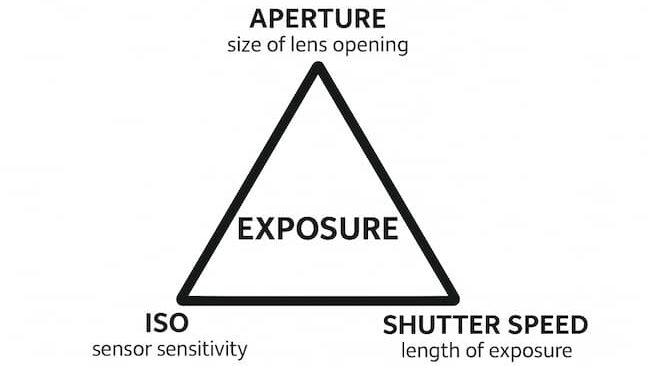
The Exposure Triangle
Exposure is controlled by three key settings, often called the Exposure Triangle:
| Element | What It Does | Effect on Exposure |
|---|---|---|
| Aperture | The size of the lens opening | Larger aperture = more light, smaller aperture = less light |
| Shutter Speed | How long the shutter stays open | Slower speed = more light, faster speed = less light |
| ISO | Sensor sensitivity to light | Higher ISO = brighter image, lower ISO = darker image |
These three elements work together — changing one affects the others. Understanding their interaction is the foundation of photography.
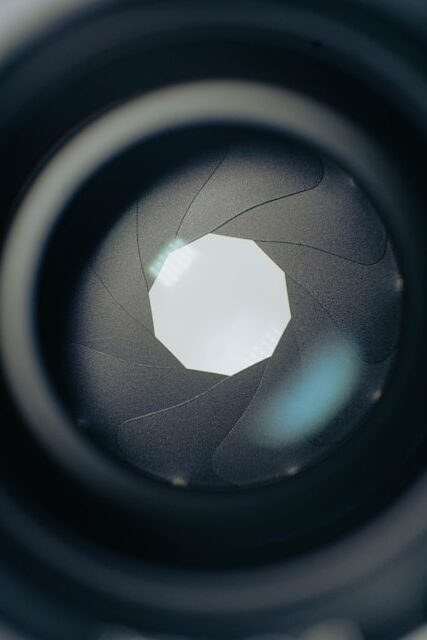
1. Aperture
- Measured in f-stops (f/1.8, f/4, f/16).
- Controls depth of field: wide aperture = blurred background; narrow aperture = more in focus.
- Tip: For portraits, a wide aperture like f/2.8 is great. For landscapes, try f/11 or higher.
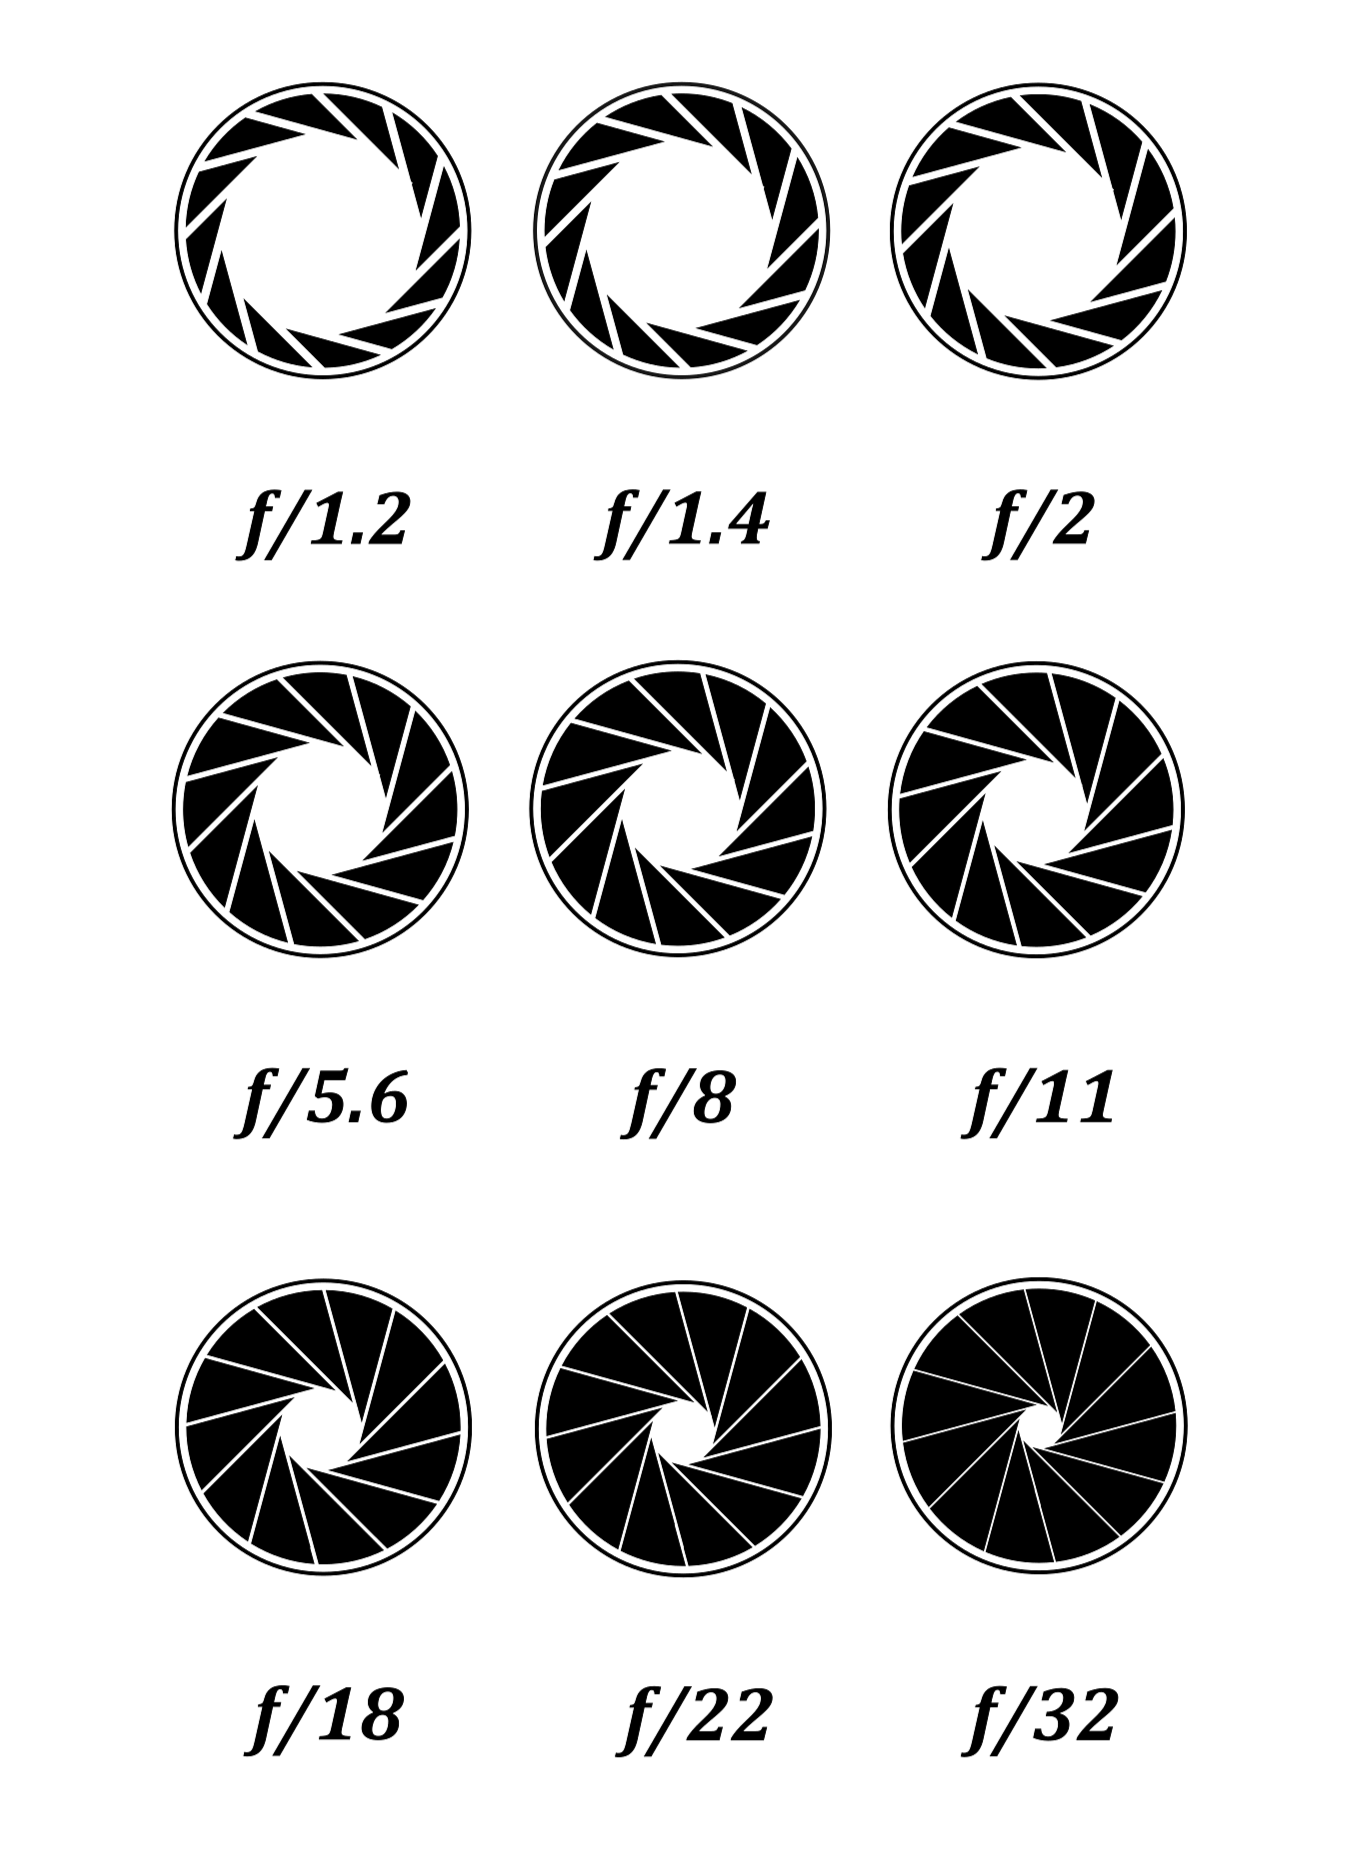
Perhaps a better analogy for aperture is to liken it to your eye, and like your eye it can dilate or contract, controlling the amount of light that enters. How dilated or contracted is measured in F-stops. Lower numbers signify larger openings, and higher numbers indicate smaller openings. Therefore a low f-stop like f/1.8 would let in more light than f/16.
Aside from affecting image brightness, aperture size also has a direct impact on the depth of field. As an example, a larger aperture (i.e., lower f-stop) narrows your depth of field. This means that only a small part of your image will be clear, while the rest is blurry—ideal for portrait photography where a crisp clear subject stands out from a blurry background.
Alternatively, a smaller aperture (higher f-stop) gives you a wider depth of field, ensuring a larger portion of the scene is in focus. This attribute works great for landscape photography, providing crispness to your broad scenic shots.
2. Shutter Speed
- Measured in seconds or fractions of a second (1/500, 1/60, 1s).
- Controls motion blur: fast shutter = freeze motion; slow shutter = blur motion.
- Tip: Use 1/125 or faster for handheld shots to avoid blur.
Shutter speed defines the duration your camera shutter, which are the blades in your lens, is open and therefore how long the sensor is exposed to that light. Faster shutter speeds, like 1/1000 means the shutter is open for 1/1000th of a second whilst 1/2 means the shutter is open for 1/2 second.
Similar to the aperture, shutter speed also has another attribute apart from controlling light. In this case it is the ability to freeze motion or create blur. Using a high shutter speed would result in freezing the motion which is ideal for actions shots like sports and nature where you want a clear sharp image without any blur. For instance you would be able to take a clear crisp image of a hummingbird in flight.
On the other hand using a slow shutter speed would create an image with blur because the sensor is exposed for longer and would therefore capture all the action whilst exposed. I am sure you have seen night shots of car light producing streaks of lights. Or the white water shots of flowing water down a stream.
3. ISO
- Measured in numbers (100, 400, 1600).
- Controls how sensitive your camera is to light.
- Tip: Keep ISO as low as possible for cleaner images, but increase it in low-light situations.
Our final corner of the exposure triangle is the ISO. Unlike the first two elements which control the exposure of the image by controlling the amount light that hits the sensor, the ISO controls the exposure by increasing or decreasing the sensor’s sensivity to the incoming light.
When the ISO is increased, the sensor becomes more sensitive to light, enabling photographers to capture brighter images in low-light situations. Conversely, decreasing the ISO reduces the sensor’s sensitivity, making it ideal for well-lit environments or when photographers desire to capture images with less noise. The ability to manipulate the ISO allows photographers to have more control over the exposure of their photos and adapt to various lighting conditions.
But be cautious though, higher ISO settings can lead to grainier images or noise, which can impact your image quality. Having said that many photographer deliberately used higher ISO settings because grainier images are part of the image they are trying to create.
Putting It All Together
That covers the basic definitions so now it is time to explore where the real magic lies – and that is how each element of the exposure triangle interact with each other.
We mentioned earlier that you could change the depth of field by changing the aperture setting. But by making such a change the amount of light entering the camera would change. We therefore need to compensate for this change be altering the settings on either the shutter speed or ISO in order to maintain the correct exposure.
So for example if we wanted a shallower depth of field we would use a wider aperture which would increase the amount of light entering the camera. To compensate and avoid over-exposure, we can either have a faster shutter speed which reduces the length of time the sensor is exposed, or we can lower the ISO to decrease the sensors sensivity to the light coming in.
Another example would be if you wanted to shoot a flowing waterfall and capture a smooth blur effect. To achieve this effect, you would need to set your camera to a slow shutter speed. However, this would allow too much light onto your sensor with the probable result of an over-exposed image. In this case in order to reduce the incoming light you can either choose a smaller aperture or select a lower ISO level.
At the end of the day it’s all an exposure balancing act using the three element in different configurations to get the desired resullt. The only way to get comfortable with it is by practicing it with your camera. So, let’s get started with some simple projects that will help you understand the interplay of the exposure triangle.
Aperture Exercise
- Set up an object in a place with consistent lighting
- Keep the shutter speed and ISO setting the same
- Begin shooting with different apertures whilst to see what affect it has on your image.
Shutter Speed Exercise
- Set up an object in a place with consistent lighting
- Keep the aperture and ISO setting the same
- Begin shooting with different shutter speeds whilst to see what affect it has on your image
ISO Exercise
After you’ve mastered shutter speed and aperture, it’s time to tinker with ISO levels.
- Set up an object in a place with consistent lighting
- Keep the aperture and shutter speed setting the same
- Begin shooting with different shutter speeds whilst to see what affect it has on your image
Quick Tips for Beginners
- Use the camera’s light meter: It shows if your exposure is too dark or bright.
- Check your histogram: A visual graph of brightness can guide adjustments.
- Bracket shots: Take multiple photos at different exposures to compare.
- Try your camera in aperture priority mode (A or Av): you control the aperture, and the camera adjusts shutter speed automatically. This lets you focus on composition while learning exposure.
Some Final Thoughts
During your practice, remember: there’s no universally “correct” exposure, so don’t get hung up on the “perfect” settings. It’s about getting the balance that’s right for your particular scene and desired effect. So if something doesn’t work the way you intended, consider it a learning experience.
Understanding aperture, shutter speed, and ISO is merely a starting point, a guide. Once you understand the simple principles of the exposure triangle, and have become comfortable with adjusting your camera settings to adapt to the different photographic senarios, don’t be afraid to break the rules. Photography is just as much an art as it is technical. So indulge your creativity!